This is what the TouchBar for my Macbook Pro looks like. Colourful, innit? These are the custom “Quick Actions” I have set up. These buttons do various tasks that are too tedious to do regularly, or I wanted to automate, simply because I had the option to do so. Even if you don’t have a Touch Bar on your MacBook, you can create these automations, and run them through keyboard shortcuts. So read on.

Some of these Quick Actions are useful for common purposes, others are very coding centric. Even in the latter case, it’s easy to take the concept, and apply it to something general. Here’s a quick rundown of what these buttons do:
- Date: Enters the current date into whatever text box is active
- Note: Opens a new Sticky Note of the colour purple
- Roger: Opens a Robot Simulator called roger (most complicated)
- Tex: Copies a .tex document preamble to the clipboard.
Here’s generalized uses of those 4 buttons:
- Enter real time information about date/time etc.
- Open up any application
- Run complex commands in terminal
- Copy text to clipboard, ready to paste.
Quick Note: There is a bit of code involved, it looks big and complicated, but don’t worry. You don’t need to even read it, except where you need to fill in a gap. For example. my code opens the Terminal App, but maybe you want to open some other app, in which case you need to swap out the name of the app you want. I want to paste in some code, whereas you want to paste in some other text, you just need to replace my placeholder, with the text you want to paste.
Here’s a general guide on how to create these buttons:
- Open the “Automator” app by either [⌘+Space], and typing “Automator”, or open Finder, go to Applications, and click on “Automator”.
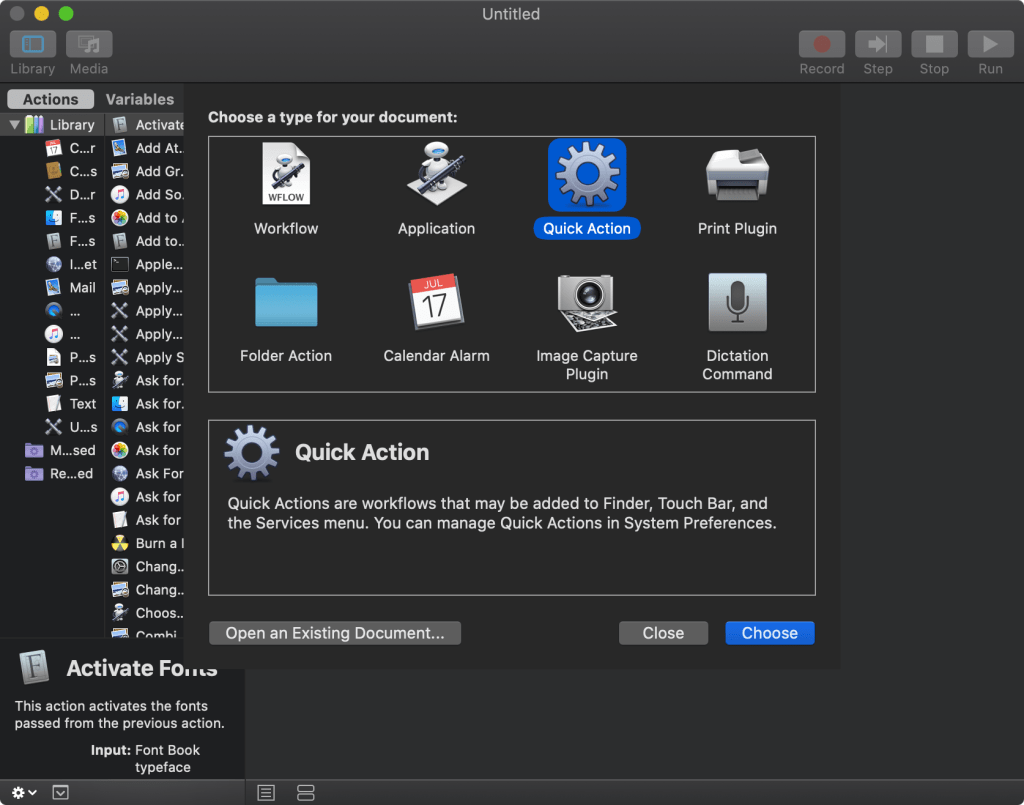
You will be greeted with this opening screen, click on the “New Document” button:

Click on “Quick Action”, then click “Choose”:
Now, on the sidebar with the long list of items that says, “Actions”, either scroll and look for “Run AppleScript”, or type it in the search bar:
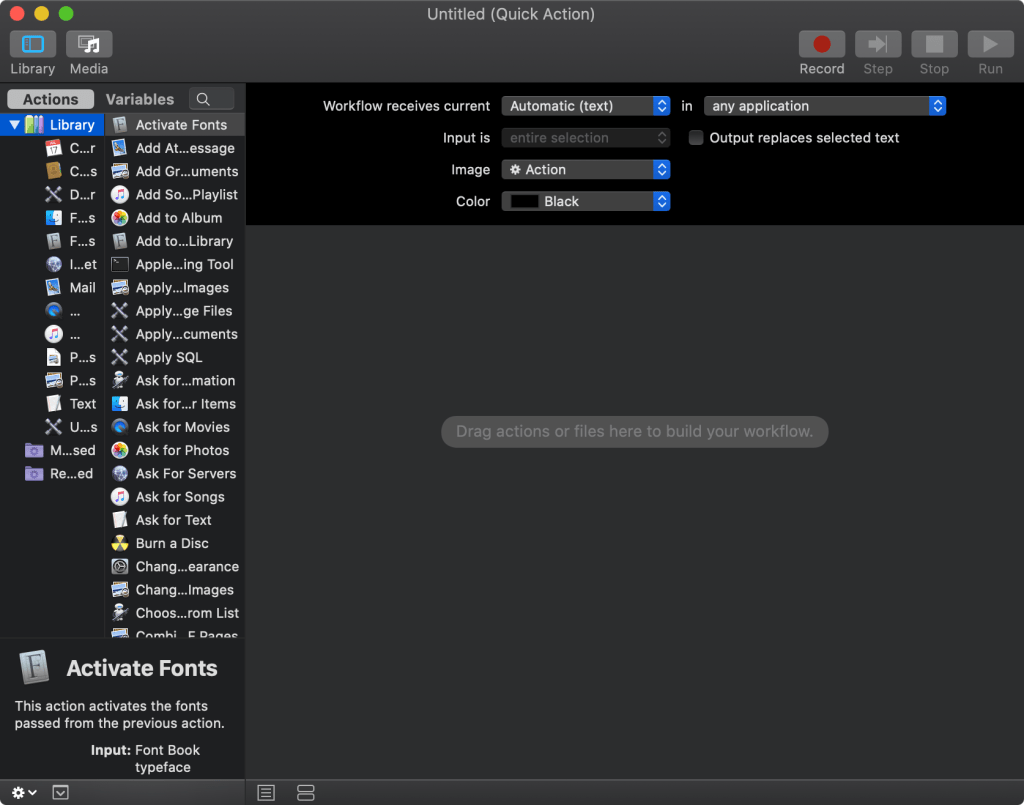
Once you find the “Run AppleScript” option, either double click it, or drag it into the empty space on the right side:

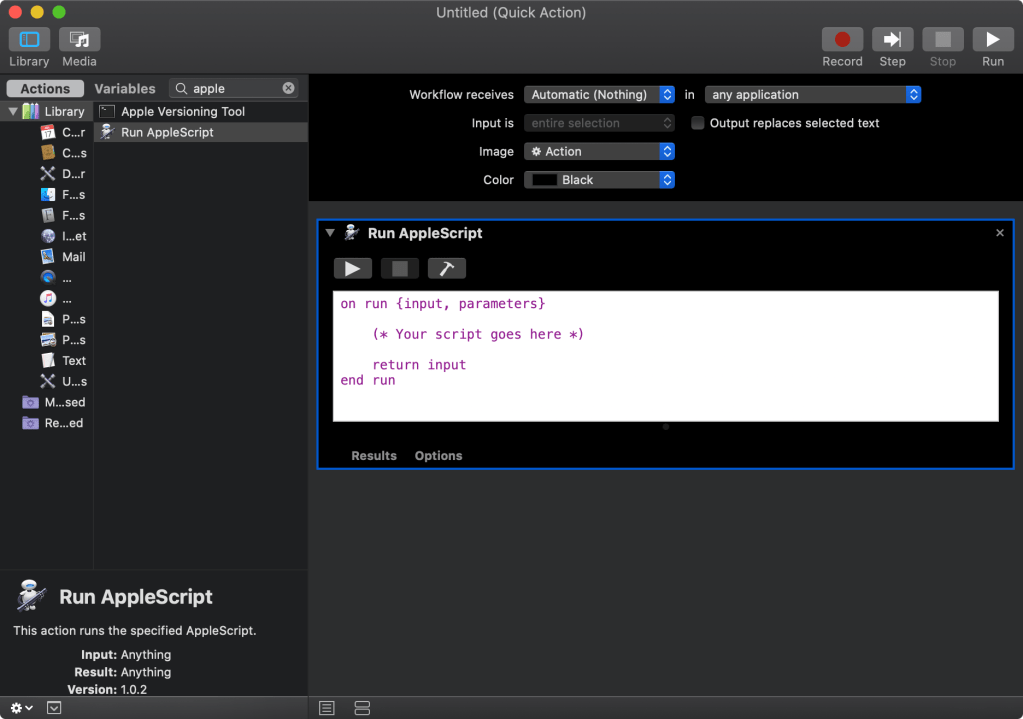
This is where you need put in the code required for the Quick Actions. No need to worry, as it’s very simple, easily readable, and has been provided by me. I will leave a generalized version of the code below, with easy instructions wherever applicable. No need to scream and run away, it’s mostly deleting a character depending on what you want, or putting in the name of the application, or your custom text. Links to the code for my exact Quick Actions will be linked at the end of this post.
Enter Realtime Date/Time information:
on run {input, parameters}
	(*
        *** INSTRUCTIONS ***
	There are three options here, remove the leading '#' from whichever option you need
	Replace the '#' whenever you need to choose another option. If multiple options are
	without a '#', the lowest one without the '#' will get executed
	*)

	-- Enter Date Only
	set finalstr to ((day of (current date) as ¬
		string) & " " & month of (current date) as ¬
		string) & ", " & year of (current date) as ¬
		string

	-- Enter Time Only
	# set finalstr to time string of (current date)

	-- Enter Date and Time
	# set finalstr to (current date)

	tell application "System Events"
		keystroke finalstr --type
	end tell

end run
Open an Application:
on run {input, parameters}
	(*
           *** INSTRUCTIONS ***
           Replace the <prompt>, in this program by whatever is prompted inside the
           arrows. For example, in <"application name">, replace the entire thing
           with "Terminal". Note that double quotes were used since they were in
           the prompt.
        *)
	if application <"application name"> is running then
		tell application <"application name"> to activate
	else
		tell application <"application name"> to launch
		tell application <"application name"> to activate
	end if
end run
Run complex Commands in Terminal
For this one, this is a barebones code, which has some essential commands you might need. It is really up to you how you want to use these things to make your own custom workflow
on run {input, parameters}

        (*
        *** INSTRUCTIONS ***
        Replace the <prompt>, in this program by whatever is prompted inside the
        arrows. For example, in <"application name">, replace the entire thing
        with "Terminal". Note that double quotes were used since they were in
        the prompt.
        *)

        -- Start Terminal
	tell application "Terminal" to activate

	-- Ask the program to wait. Use this after any command that ¬
        might take time to execute. So the next command will be delayed by ¬
        the specified time
        delay 0.1

        -- Press Command + any_key combination
	tell application "System Events" to keystroke "n" using command down

        -- Remove the "to" after the application name, to go into a block ¬
        telling the same app to do multiple commands. Indent code. End ¬
        block with "end tell"
	tell application "System Events"
		-- Enter any commands you'd like to execute.
		-- Always keystroke return after every command
		keystroke "ls"
		keystroke return
		delay 0.1

		-- If you need to open a new terminal window and shift to it
		keystroke "n" using command down
	end tell
end run
Copy text to clipboard
-- NOTE: This text can be multiline
on run {input, parameters}
	set the clipboard to "test text"
end run
Now that you have the code for those 4 uses. Click the small hammer icon above the text box. If you don’t have any errors, your text will get coloured like so:

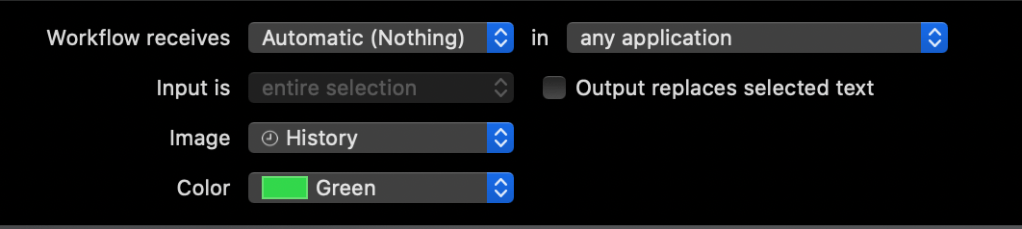
Once you have pressed the hammer, you can now move up to the options above this text box. Here, you only need to change the Image, and the colour you want your button to be. If you have a MacBook without a Touch Bar, this step can be ignored, since these shortcuts will be mapped to a keyboard shortcut.
Once this is done, you can go ahead and save the file using [⌘+S]. This is now a Quick Action in your MacBook. Now, you can go to System Preferences by either clicking on the Apple logo on the top left, or typing it in after pressing [⌘+Space]. When you do reach System Preferences, click on Keyboard. In Keyboard, if you have a Touch Bar, you can set the Fn key to “show Quick Actions”, like so:
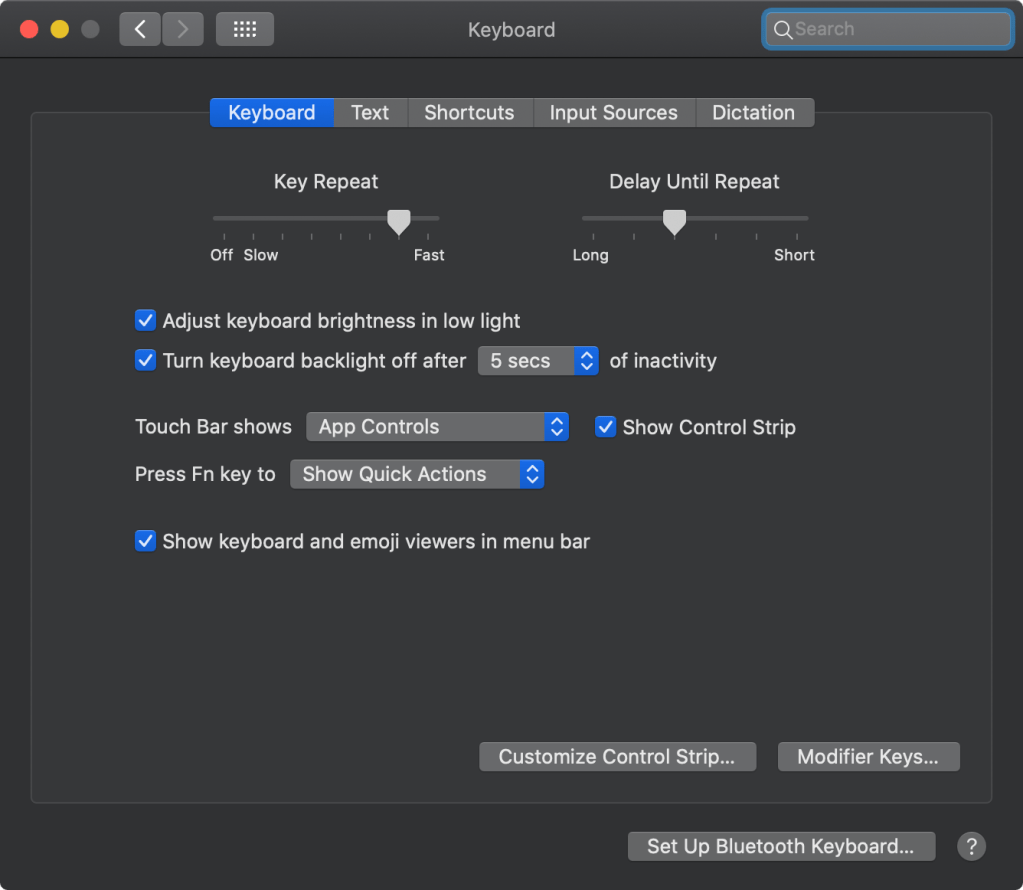
Now, every time you press the Fn key, you can see the Quick Action that you set up!
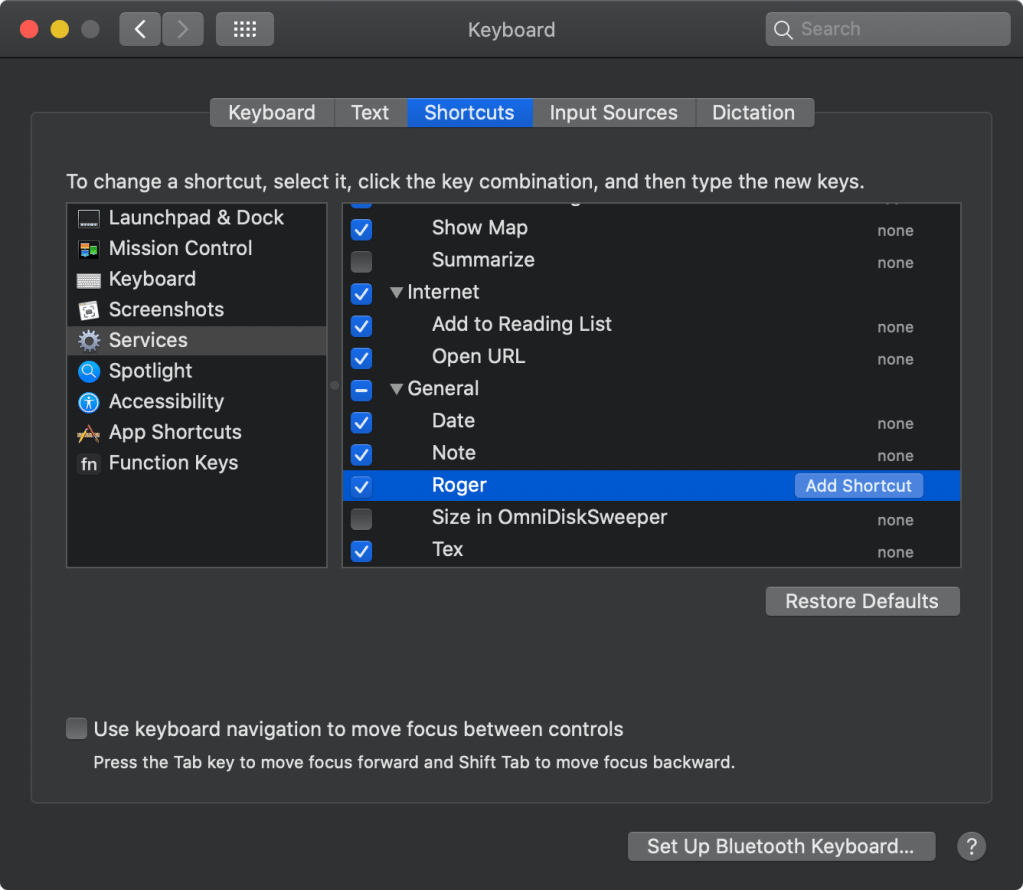
If you do not have a Touch Bar, you can go to the “Shortcuts” tab on the top, go to “Services”, scroll down to “General”, and click on, “Add Shortcut” to add a Keyboard bind to your Quick Action. From now on, every time you enter that specific combination of keyboard keys, the system will execute your Quick Action.
You might need to give some permissions to the system, but that is safe, and you can feel free to give those permissions. We need these permissions since the the shortcut needs access to simulated keyboard presses, launching applications etc.
And Lo! Now your Quick Actions are set up for real! Now you can feel like extra productive while working by Automating these small tasks. Start out small, then continue exploring the code to try and implement more and more complicated shortcuts.
Here are the links to my specific code:
- Sticky Notes
- Enter Date
- Enter Time
- I’m not linking to the Roger Shortcut, since that is a specific workflow that no one else is going to be using.
